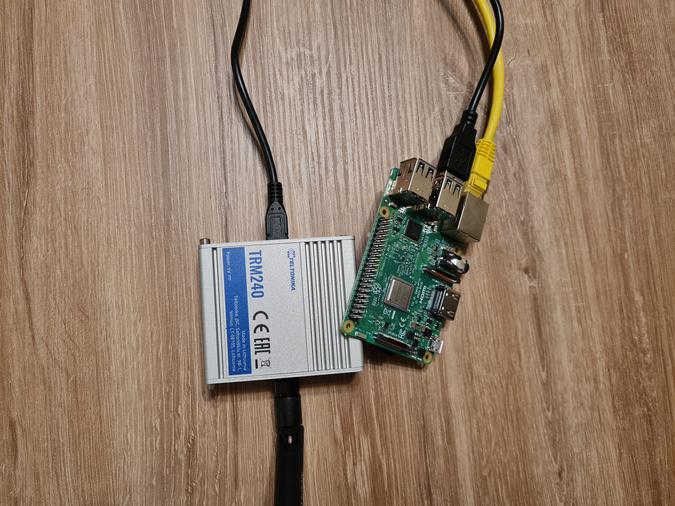
In today's interconnected world, RemoteIoT behind router configurations using Raspberry Pi has become a popular solution for managing and controlling IoT devices remotely. Whether you're a hobbyist, developer, or professional, understanding how to set up and configure your Raspberry Pi to work seamlessly behind a router can unlock endless possibilities for your IoT projects. This guide will walk you through the entire process, ensuring you have all the information you need to get started.
As IoT technology continues to evolve, the demand for remote access to devices has surged. With Raspberry Pi's versatility and affordability, it has become a go-to platform for building remote IoT solutions. However, setting up your Raspberry Pi to function behind a router requires specific configurations to ensure secure and reliable connections. This article will provide you with step-by-step instructions to achieve this.
This guide is designed for anyone looking to enhance their knowledge of Raspberry Pi and IoT systems. By the end of this article, you will have a clear understanding of the tools, configurations, and best practices for setting up a remote IoT system using Raspberry Pi while ensuring security and efficiency.
Table of Contents
- Introduction to RemoteIoT Behind Router
- Raspberry Pi: An Overview
- Networking Basics for IoT Devices
- Router Configurations for RemoteIoT
- Understanding Port Forwarding
- Security Measures for RemoteIoT
- Software Setup on Raspberry Pi
- Remote Access Tools and Solutions
- Troubleshooting Tips for Common Issues
- Best Practices for RemoteIoT
- Conclusion and Next Steps
Introduction to RemoteIoT Behind Router
RemoteIoT behind router setups are essential for managing IoT devices from anywhere in the world. Using a Raspberry Pi as the central hub for these operations allows users to create cost-effective and scalable solutions. In this section, we will explore the basics of remote IoT setups and why they are important for modern applications.
Why Use Raspberry Pi for RemoteIoT?
Raspberry Pi offers several advantages for remote IoT setups, including:
- Low cost and high performance
- Compatibility with various operating systems and software
- Extensive community support and resources
These features make Raspberry Pi an ideal choice for developers and enthusiasts alike.
Raspberry Pi: An Overview
Raspberry Pi is a series of small single-board computers developed by the Raspberry Pi Foundation. It is widely used in educational settings, home automation, and IoT projects due to its affordability and flexibility.
Key Features of Raspberry Pi
- Processor: Broadcom BCM2835 or later models
- Memory: Ranges from 512MB to 8GB depending on the model
- Connectivity: Built-in Wi-Fi, Bluetooth, and Ethernet
- GPIO Pins: For connecting external devices and sensors
Understanding the capabilities of Raspberry Pi is crucial for designing effective remote IoT systems.
Networking Basics for IoT Devices
Networking plays a vital role in enabling remote access to IoT devices. This section will cover the fundamental concepts of networking that are relevant to setting up a Raspberry Pi behind a router.
Understanding IP Addresses
An IP address is a unique identifier assigned to each device on a network. For RemoteIoT setups, it is important to distinguish between:
- Private IP addresses: Used within a local network
- Public IP addresses: Used for communication over the internet
Knowing the difference between these two types of IP addresses is essential for configuring your Raspberry Pi correctly.
Router Configurations for RemoteIoT
Your router acts as the gateway between your local network and the internet. Proper configuration of your router is necessary to allow remote access to your Raspberry Pi.
Setting Up a Static IP Address
Assigning a static IP address to your Raspberry Pi ensures that its network address remains consistent. This is important for maintaining reliable connections. To set up a static IP address:
- Access your router's admin interface
- Locate the DHCP reservation settings
- Reserve an IP address for your Raspberry Pi's MAC address
By following these steps, you can ensure that your Raspberry Pi always uses the same IP address on your local network.
Understanding Port Forwarding
Port forwarding is a technique that allows external devices to connect to your Raspberry Pi through your router. This section will explain how port forwarding works and how to configure it for your RemoteIoT setup.
Steps to Configure Port Forwarding
- Identify the port numbers required by your application
- Log in to your router's admin panel
- Set up port forwarding rules to direct traffic to your Raspberry Pi's IP address
Port forwarding is a critical step in enabling remote access to your IoT devices.
Security Measures for RemoteIoT
Security should always be a top priority when setting up remote IoT systems. This section will discuss various security measures to protect your Raspberry Pi and connected devices.
Implementing SSH for Secure Connections
SSH (Secure Shell) is a protocol that provides secure communication between devices. Enabling SSH on your Raspberry Pi ensures that all data transmitted is encrypted and secure.
Additional security measures include:
- Using strong passwords
- Enabling firewalls
- Regularly updating software and firmware
By implementing these measures, you can significantly reduce the risk of unauthorized access to your IoT system.
Software Setup on Raspberry Pi
Setting up the appropriate software on your Raspberry Pi is essential for RemoteIoT functionality. This section will guide you through the installation and configuration process.
Installing Required Software
Some of the essential software packages for RemoteIoT setups include:
- Raspbian or other Raspberry Pi OS
- Python and relevant libraries
- Node-RED for visual programming
Following the official Raspberry Pi documentation can help you install and configure these packages effectively.
Remote Access Tools and Solutions
Several tools and solutions are available for remote access to Raspberry Pi. This section will explore some of the most popular options.
Popular Remote Access Tools
- VNC Viewer: For graphical remote desktop access
- TeamViewer: A versatile tool for remote control
- ngrok: For creating secure tunnels to local servers
Choosing the right tool depends on your specific requirements and the nature of your IoT project.
Troubleshooting Tips for Common Issues
Encountering issues during setup is common. This section will provide troubleshooting tips to help you resolve common problems.
Common Issues and Solutions
- Connection problems: Check your router's configuration and ensure port forwarding is set up correctly.
- Software errors: Verify that all software is up to date and reinstall if necessary.
- Security alerts: Review your security settings and ensure all protocols are followed.
By addressing these issues systematically, you can overcome most challenges in your RemoteIoT setup.
Best Practices for RemoteIoT
Adhering to best practices ensures that your RemoteIoT system operates efficiently and securely. This section will outline some key practices to follow.
Key Best Practices
- Regularly back up your Raspberry Pi's data
- Monitor network activity for unusual patterns
- Document your setup process for future reference
Implementing these practices can help you maintain a robust and reliable RemoteIoT system.
Conclusion and Next Steps
In conclusion, setting up a RemoteIoT system behind a router using Raspberry Pi is a powerful way to manage and control IoT devices remotely. By following the steps outlined in this guide, you can create a secure and efficient setup tailored to your needs.
We encourage you to share your thoughts and experiences in the comments section below. Additionally, consider exploring other articles on our site for more insights into IoT and Raspberry Pi projects. Together, let's continue to innovate and push the boundaries of what is possible with modern technology.