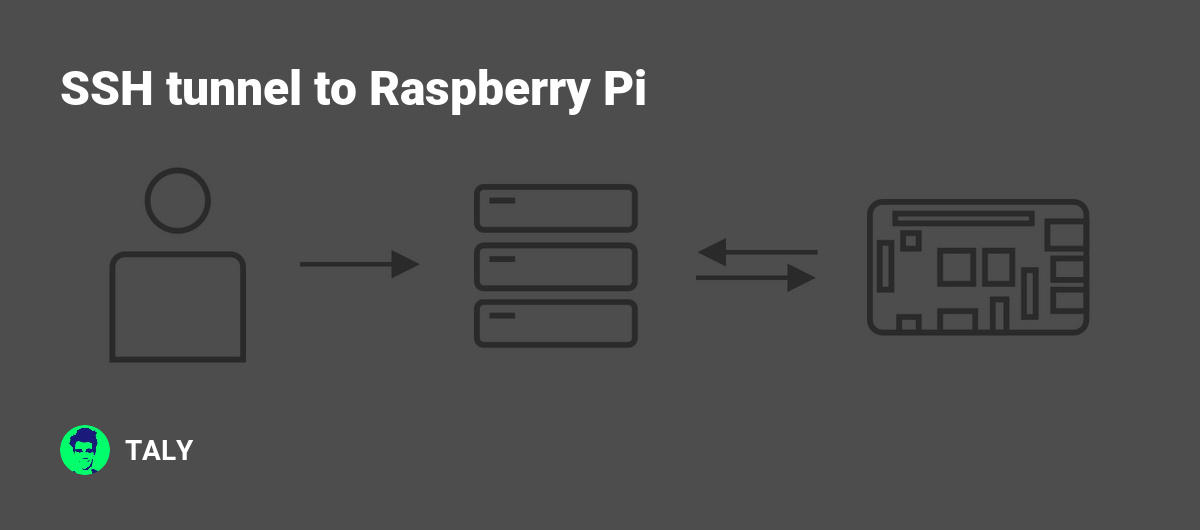
Are you looking to enhance the security of your remote connections using Raspberry Pi SSH tunnel? This comprehensive guide will walk you through everything you need to know about setting up and managing SSH tunnels on your Raspberry Pi device. Whether you're a beginner or an advanced user, this article provides in-depth insights into Raspberry Pi SSH tunneling.
Raspberry Pi SSH tunnel has become an essential tool for anyone who needs secure remote access to their devices. This powerful technology allows users to create encrypted connections between devices, ensuring that sensitive data remains protected from unauthorized access.
In this article, we will explore the concept of Raspberry Pi SSH tunneling, step-by-step setup instructions, security considerations, and practical use cases. By the end of this guide, you'll have a solid understanding of how to leverage SSH tunnels for secure communication and remote access.
Table of Contents
- Introduction to Raspberry Pi SSH Tunnel
- What is SSH?
- Raspberry Pi Overview
- Setting Up SSH on Raspberry Pi
- Types of SSH Tunnels
- How to Create an SSH Tunnel
- Security Best Practices for SSH Tunneling
- Use Cases for Raspberry Pi SSH Tunnel
- Troubleshooting Common Issues
- Conclusion
- Resources and References
Introduction to Raspberry Pi SSH Tunnel
SSH tunneling is a powerful technique that allows users to securely transfer data between devices over an encrypted connection. When combined with the versatility of Raspberry Pi, this technology becomes an invaluable tool for remote access and secure communication. The Raspberry Pi SSH tunnel setup is relatively simple, making it accessible to both beginners and experienced users.
With the growing demand for remote work and secure communication, understanding how Raspberry Pi SSH tunnel works is more important than ever. This guide will provide you with the knowledge and tools necessary to set up and manage SSH tunnels effectively.
What is SSH?
SSH, or Secure Shell, is a cryptographic network protocol designed to provide secure communication over an unsecured network. It is widely used for remote login and other secure network services. SSH ensures the confidentiality and integrity of data exchanged between devices by encrypting the communication channel.
Key Features of SSH
- Encryption: SSH encrypts all data transmitted between devices, ensuring that sensitive information remains secure.
- Authentication: SSH supports various authentication methods, including password-based and public key authentication.
- Port Forwarding: SSH allows users to forward ports, enabling secure access to services running on remote machines.
Raspberry Pi Overview
Raspberry Pi is a series of small, affordable single-board computers developed by the Raspberry Pi Foundation. These devices are widely used for educational purposes, home automation, and various DIY projects. The Raspberry Pi's versatility makes it an ideal platform for experimenting with SSH tunneling.
Why Use Raspberry Pi for SSH Tunneling?
- Cost-effective: Raspberry Pi devices are inexpensive, making them accessible to a wide range of users.
- Compact Size: The small form factor of Raspberry Pi makes it easy to deploy in various environments.
- Community Support: Raspberry Pi has a large and active community, providing extensive resources and support for users.
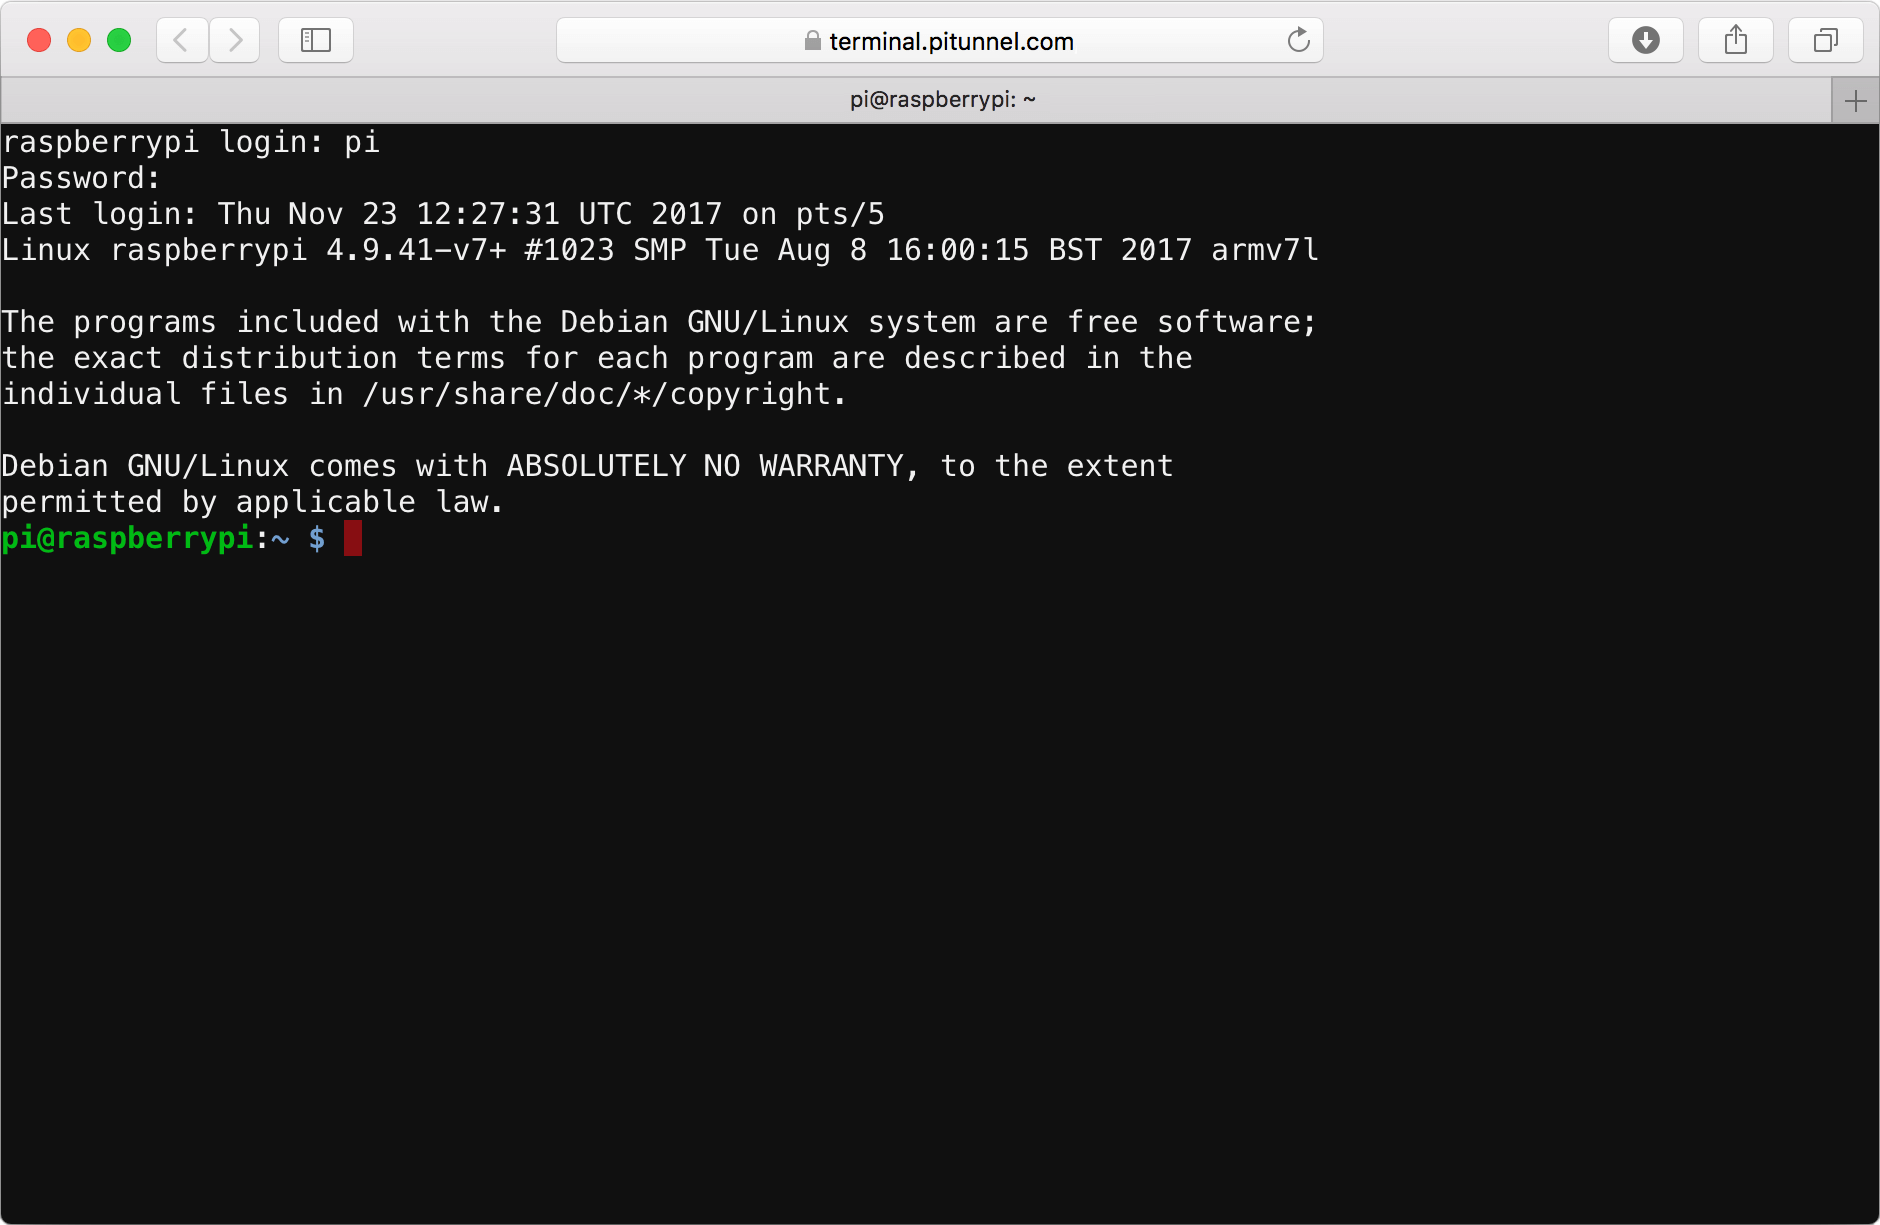
Setting Up SSH on Raspberry Pi
Before creating an SSH tunnel, you need to enable SSH on your Raspberry Pi device. Follow these steps to set up SSH on your Raspberry Pi:
Step 1: Enable SSH
To enable SSH on your Raspberry Pi, you can use the Raspberry Pi Configuration tool or modify the configuration file manually. Here's how to do it:
- Open the Raspberry Pi Configuration tool from the main menu.
- Go to the "Interfaces" tab.
- Select "SSH" and choose "Enabled."
Step 2: Update Your System
Ensure your Raspberry Pi system is up to date by running the following commands in the terminal:
sudo apt update
sudo apt upgrade
Step 3: Find Your Pi's IP Address
To connect to your Raspberry Pi remotely, you need to know its IP address. You can find the IP address by running the following command:
hostname -I
Types of SSH Tunnels
There are three main types of SSH tunnels: local, remote, and dynamic. Each type serves a specific purpose and is used in different scenarios.
Local SSH Tunnel
A local SSH tunnel allows you to forward a port from your local machine to a remote server. This is useful when you want to access services running on the remote server securely.
Remote SSH Tunnel
A remote SSH tunnel enables you to forward a port from a remote server to your local machine. This is helpful when you need to expose a service running on your local machine to the remote server.
Dynamic SSH Tunnel
A dynamic SSH tunnel acts as a SOCKS proxy, allowing you to forward multiple ports and protocols through a single connection. This is ideal for securing all your internet traffic when connecting through an untrusted network.
How to Create an SSH Tunnel
Creating an SSH tunnel involves using the SSH command with specific options to define the type of tunnel and the ports to forward. Below are examples of how to create different types of SSH tunnels:
Local SSH Tunnel Example
ssh -L local_port:destination_host:destination_port user@remote_server
Remote SSH Tunnel Example
ssh -R remote_port:destination_host:destination_port user@remote_server
Dynamic SSH Tunnel Example
ssh -D local_port user@remote_server
Security Best Practices for SSH Tunneling
While SSH tunneling provides a secure method for remote access, it's essential to follow best practices to ensure the highest level of security:
Use Strong Passwords
Ensure that all user accounts on your Raspberry Pi have strong, unique passwords to prevent unauthorized access.
Enable Public Key Authentication
Public key authentication is a more secure method than password-based authentication. Generate a key pair and add the public key to the authorized_keys file on your Raspberry Pi.
Disable Root Login
Disabling root login reduces the risk of brute-force attacks. Edit the SSH configuration file (/etc/ssh/sshd_config) and set "PermitRootLogin" to "no."
Use Cases for Raspberry Pi SSH Tunnel
Raspberry Pi SSH tunnel has numerous practical applications, including:
Secure Remote Access
SSH tunnels allow users to securely access their Raspberry Pi devices from anywhere in the world, ensuring that sensitive data remains protected.
Private Browsing
By setting up a dynamic SSH tunnel, you can route your internet traffic through your Raspberry Pi, providing an additional layer of privacy and security.
Accessing Restricted Services
SSH tunnels can be used to bypass firewalls and access services that are otherwise restricted in certain networks.
Troubleshooting Common Issues
Here are some common issues you may encounter when setting up an SSH tunnel and how to resolve them:
Connection Refused
If you receive a "Connection refused" error, ensure that SSH is enabled on your Raspberry Pi and that the IP address and port number are correct.
Authentication Failed
If authentication fails, double-check your username and password. If you're using public key authentication, ensure that the public key is correctly added to the authorized_keys file.
Conclusion
Raspberry Pi SSH tunnel is a powerful tool for secure remote access and communication. By following the steps outlined in this guide, you can set up and manage SSH tunnels effectively, ensuring the protection of your sensitive data. Remember to adhere to security best practices to maximize the security of your SSH connections.
We encourage you to share this article with others who may benefit from learning about Raspberry Pi SSH tunneling. Feel free to leave a comment below if you have any questions or additional tips to share.
Resources and References
For further reading and in-depth information, refer to the following resources: