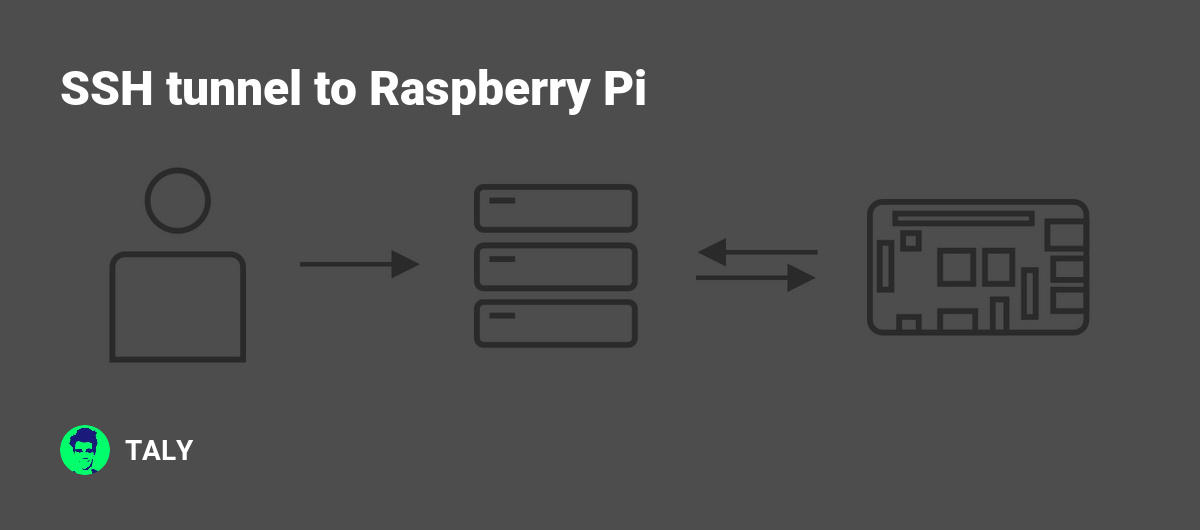
Setting up a Raspberry Pi SSH tunnel proxy is an excellent way to enhance your network security and privacy. In today's digital age, ensuring secure connections is crucial for protecting sensitive data. By leveraging the power of Raspberry Pi, you can create a robust SSH tunnel proxy that provides encrypted communication channels.
Whether you're a tech enthusiast, a small business owner, or simply someone who values privacy, understanding how Raspberry Pi SSH tunnel proxy works is essential. This guide will walk you through everything you need to know, from the basics to advanced configurations, ensuring you can set up and manage your proxy effectively.
In the following sections, we'll explore the importance of SSH tunneling, step-by-step instructions for setting up your Raspberry Pi, troubleshooting tips, and best practices. By the end of this article, you'll have the knowledge and tools to implement a secure and efficient Raspberry Pi SSH tunnel proxy tailored to your needs.
Table of Contents
- What is SSH Tunnel Proxy?
- Raspberry Pi Overview
- Setting Up Raspberry Pi
- Configuring SSH Tunnel
- Creating Proxy Server
- Testing SSH Tunnel Proxy
- Troubleshooting Common Issues
- Best Practices for Raspberry Pi SSH Tunnel Proxy
- Security Considerations
- Conclusion
What is SSH Tunnel Proxy?
An SSH tunnel proxy is a secure method of forwarding network traffic between two systems by encapsulating it within an encrypted SSH connection. This technique is widely used to bypass firewalls, access restricted content, and protect data during transmission.
SSH tunneling works by creating a secure channel between a client and a server. The data passing through this channel is encrypted, making it difficult for unauthorized parties to intercept or decipher the information. A proxy server, on the other hand, acts as an intermediary between your device and the internet, forwarding requests and responses.
Why Use SSH Tunnel Proxy?
- Enhanced Security: Encrypts all data transmissions, reducing the risk of data breaches.
- Privacy Protection: Masks your IP address and location, ensuring anonymity online.
- Access Restricted Content: Bypasses geographical restrictions and firewalls.
- Improved Performance: Reduces latency and optimizes bandwidth usage.
Raspberry Pi Overview
Raspberry Pi is a small, affordable computer that can be used for a variety of purposes, including setting up a Raspberry Pi SSH tunnel proxy. It is a versatile device with a wide range of applications, from home automation to server hosting.
Raspberry Pi comes in several models, each with different specifications. The most popular models for SSH tunnel proxy setups include Raspberry Pi 4 and Raspberry Pi 3. These models offer sufficient processing power, memory, and connectivity options to handle proxy server tasks efficiently.
Key Features of Raspberry Pi
- Compact Size: Easy to deploy in various environments.
- Low Power Consumption: Ideal for long-term operations.
- Customizable: Supports a wide range of operating systems and software configurations.
- Community Support: Extensive resources and tutorials available online.
Setting Up Raspberry Pi
Before setting up a Raspberry Pi SSH tunnel proxy, you need to prepare your Raspberry Pi device. This involves installing an operating system, configuring network settings, and enabling SSH.
Step 1: Install Operating System
Choose an operating system compatible with Raspberry Pi, such as Raspberry Pi OS or Ubuntu Server. Download the image file and write it to an SD card using tools like Balena Etcher or Raspberry Pi Imager.
Step 2: Configure Network Settings
Ensure your Raspberry Pi is connected to the internet via Ethernet or Wi-Fi. You can configure network settings during the initial setup process or by editing the configuration files directly.
Step 3: Enable SSH
To enable SSH on Raspberry Pi, create an empty file named "ssh" in the boot partition of the SD card. Alternatively, you can enable SSH through the Raspberry Pi Configuration tool.
Configuring SSH Tunnel
Once your Raspberry Pi is set up, you can proceed to configure the SSH tunnel. This involves generating SSH keys, setting up port forwarding, and establishing a secure connection.
Generating SSH Keys
SSH keys provide a secure way to authenticate users without requiring passwords. Use the following command to generate SSH keys:
ssh-keygen -t rsa -b 4096
This command generates a 4096-bit RSA key pair. Save the keys in the default directory (~/.ssh/) or specify a custom location.
Setting Up Port Forwarding
Port forwarding allows you to redirect network traffic from one port to another. For example, you can forward traffic from port 8080 on your local machine to port 80 on the Raspberry Pi:
ssh -L 8080:localhost:80 user@raspberrypi
This command creates a local port forwarding rule that listens on port 8080 and forwards traffic to port 80 on the Raspberry Pi.
Creating Proxy Server
After configuring the SSH tunnel, the next step is to set up the proxy server on Raspberry Pi. This involves installing and configuring a proxy software such as Squid or Tinyproxy.
Installing Proxy Software
Use the following command to install Squid on Raspberry Pi:
sudo apt update
sudo apt install squid
Once installed, edit the Squid configuration file (/etc/squid/squid.conf) to customize settings such as access control and caching policies.
Configuring Proxy Settings
To configure the proxy settings, specify the allowed IP addresses, ports, and authentication methods. For example:
http_access allow localnet
http_port 3128
These settings allow traffic from the local network to access the proxy server on port 3128.
Testing SSH Tunnel Proxy
After completing the setup, it's essential to test your Raspberry Pi SSH tunnel proxy to ensure it works as expected. This involves verifying the connection, checking the logs, and monitoring performance metrics.
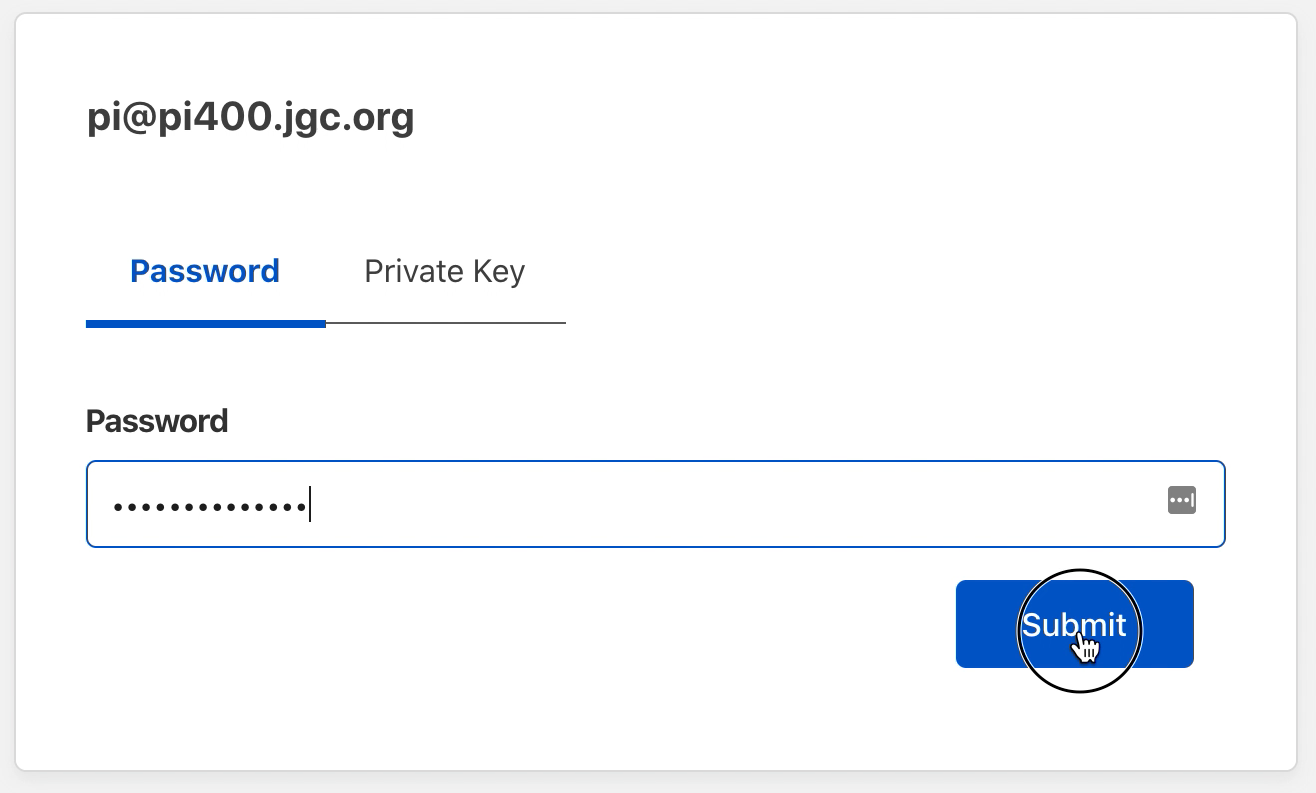
Verifying Connection
Use the following command to test the SSH connection:
ssh -T user@raspberrypi
This command attempts to establish a connection to the Raspberry Pi. If successful, you should see a message indicating that the connection is established.
Checking Logs
Review the system logs to identify any errors or issues. Use the following command to view the logs:
sudo tail -f /var/log/syslog
This command displays the latest log entries in real-time, allowing you to monitor the proxy server's activity.
Troubleshooting Common Issues
Despite careful planning, issues may arise during the setup and operation of your Raspberry Pi SSH tunnel proxy. Below are some common problems and their solutions:
Connection Refused
If you encounter a "connection refused" error, verify that the SSH service is running and that the firewall rules allow incoming connections on the specified port.
Slow Performance
Optimize your proxy server settings to improve performance. Adjust the caching policies, limit the number of concurrent connections, and ensure sufficient resources are available.
Best Practices for Raspberry Pi SSH Tunnel Proxy
To ensure the reliability and security of your Raspberry Pi SSH tunnel proxy, follow these best practices:
- Regularly update the operating system and software to patch vulnerabilities.
- Use strong passwords and enable two-factor authentication for added security.
- Monitor system logs and performance metrics to detect and address issues promptly.
- Limit access to trusted users and devices to minimize the risk of unauthorized access.
Security Considerations
Security is a critical aspect of setting up a Raspberry Pi SSH tunnel proxy. By implementing the following measures, you can enhance the security of your setup:
Encrypt Data in Transit
Ensure all data transmitted through the SSH tunnel is encrypted using strong encryption algorithms. This prevents eavesdropping and data interception by malicious actors.
Restrict Access
Limit access to the proxy server by configuring firewall rules and access control lists. Only allow trusted IP addresses and devices to connect to the server.
Conclusion
Setting up a Raspberry Pi SSH tunnel proxy is a powerful way to enhance your network security and privacy. By following the steps outlined in this guide, you can create a secure and efficient proxy server tailored to your needs.
We encourage you to share your experience and insights in the comments section below. Your feedback helps us improve and provide more valuable content. Additionally, feel free to explore other articles on our site for more tips and tutorials on technology and networking.
References: